Advertisement

Support
Setup Dialup for Windows XP
Follow the Step-by-Step guide below to setup your PhilOnline's Dial-Up connection in Microsoft Windows XP.
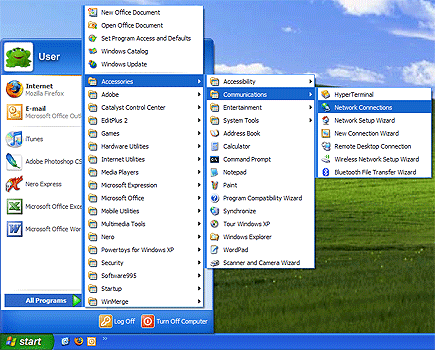
Click the Start button (found at the bottom left hand corner of your desktop). The click All Programs, then Accessories, then Communications and finally Network Connections.
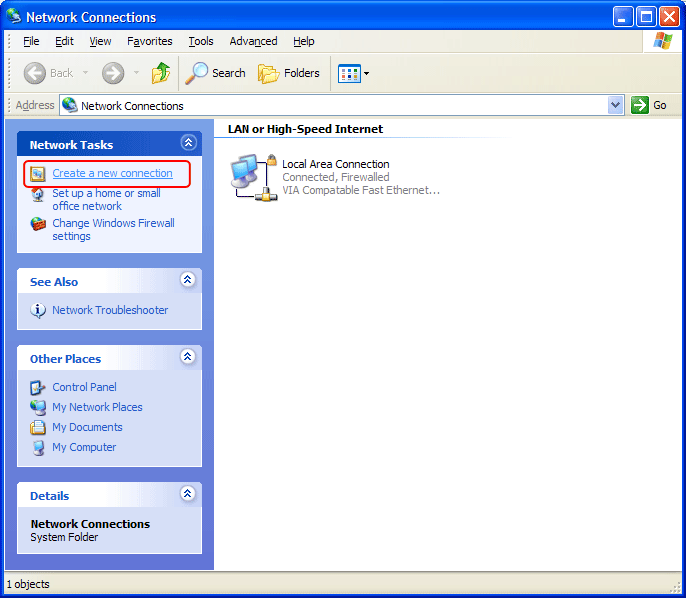
Click Create a new connection link under Network Tasks found on the left panel of the Network Connections window.
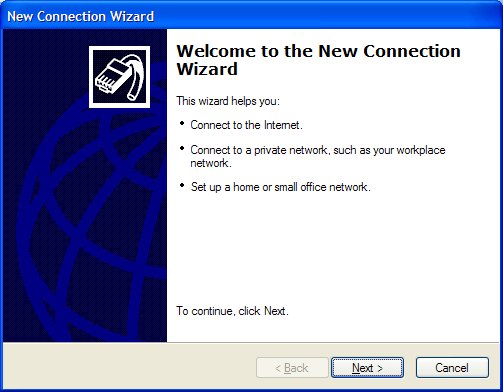
This will open the New Connection Wizard. Click Next.
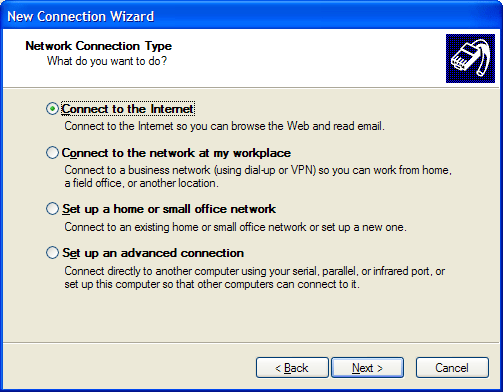
For the Network Connection Type, select Connect to the Internet from the options given, then click Next.
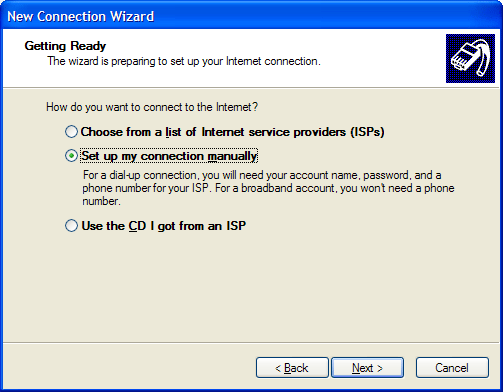
When asked as to how you want to connect to the Internet, select Set up my connection manually from the options given, then click Next.
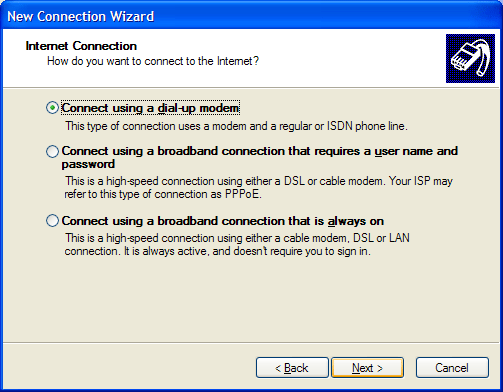
For the Internet Connection, select Connect using a dial-up modem from the options given, then click Next.
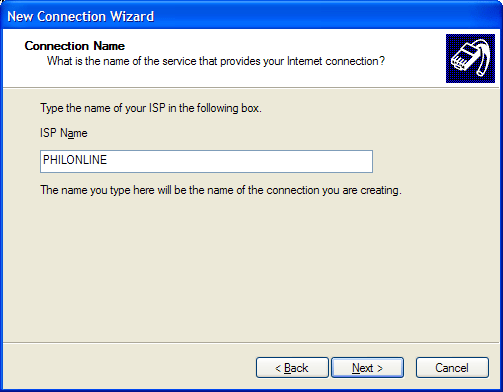
For the Connection Name, type a name by which to identify this connection. In this case, enter PHILONLINE, then click Next.
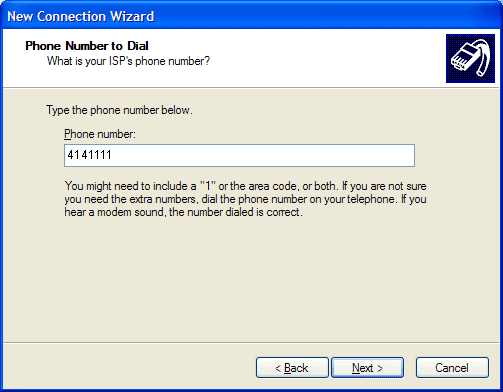
Enter the PHILONLINE dial-up number to dial for your area in the Telephone number field and click Next.
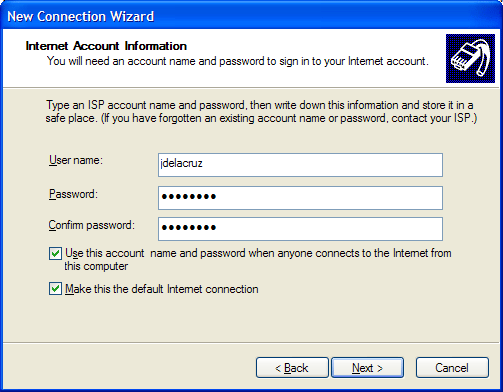
When asked to provide the Internet Account Information, just enter your PhilOnline username and password (re-type your password on the Confirm password field).
The next three check boxes are optional. PhilOnline recommends checking all three, but the actual choices depend on the users' preferences. Once done, click Next.
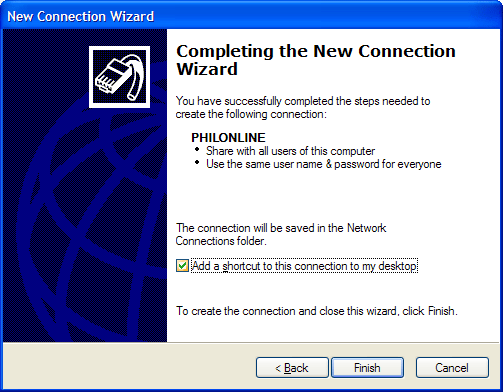
You have now completed the New Connection Wizard. Put a check in the box labeled Add a shortcut to this connection to my desktop. Then click the Finish button.